Most notably about this project was that it was Sarah’s first time ever using a jigsaw. She’s pretty much ready to completely renovate an entire house now.
This is how we turned a few sheets of 4’x8′ hardboard into what we call “The Wicked Woods”, a silhouette based haunted forest scene.
It All Starts Here
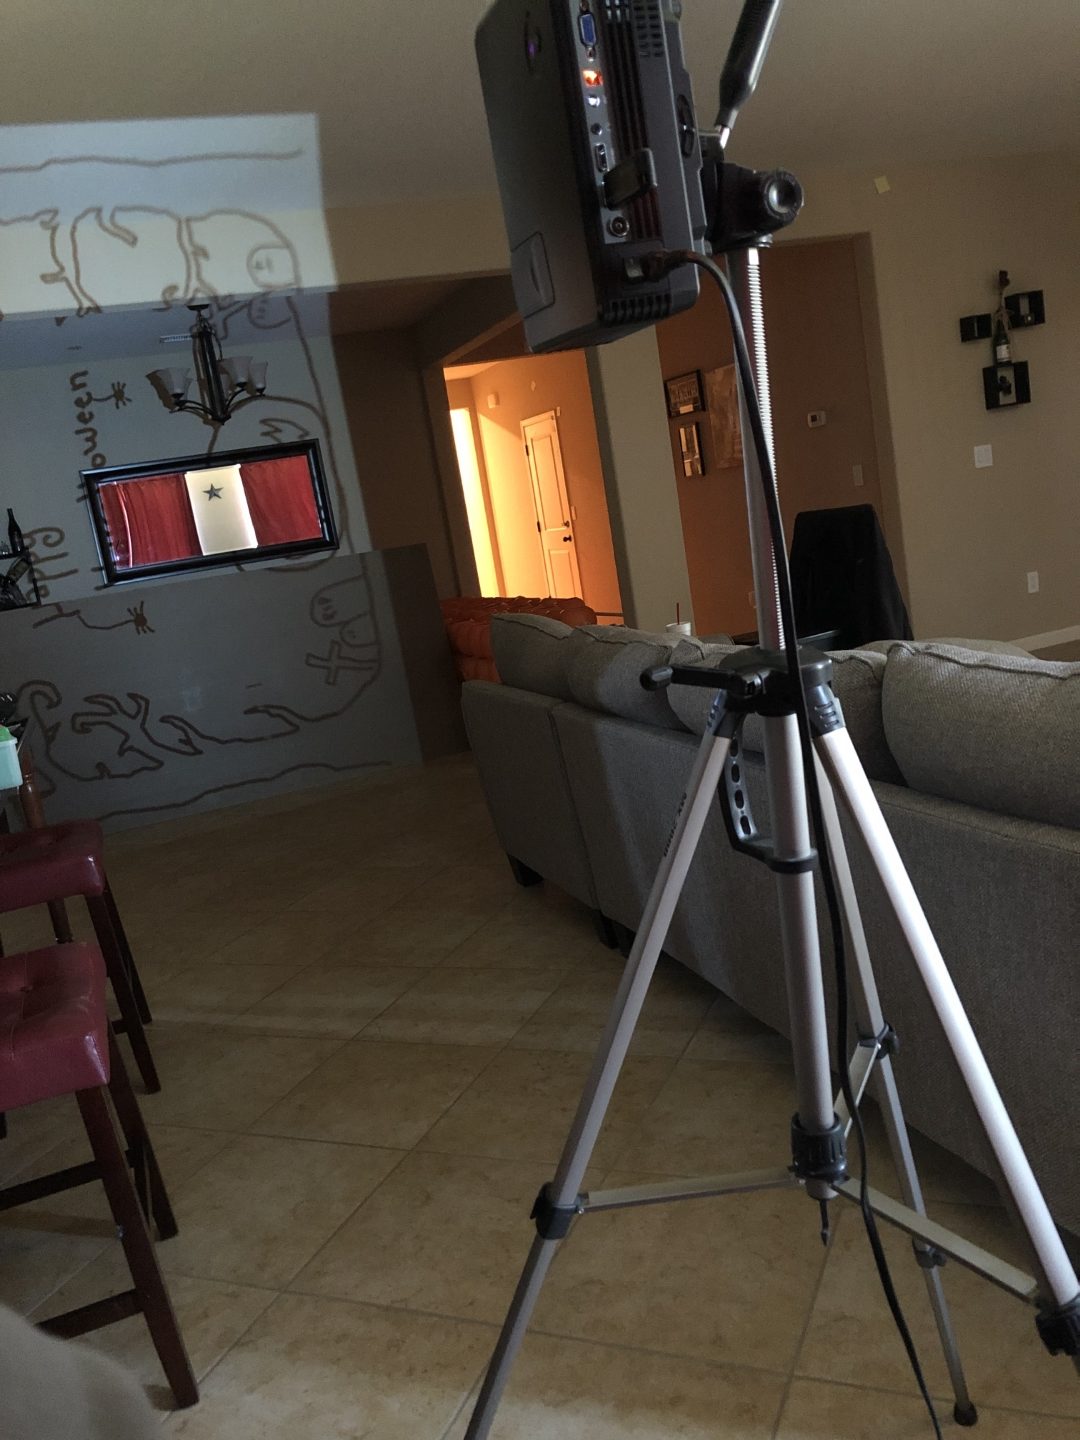
Sarah made her ideal pattern using some MS-Paint-like program on the computer. I then took the image and put it on a USB drive and connected it to one of our terrible Halloween projectors that had previously bought so that we could project her image onto the hardboard panels. From here, we just needed to expand the position the projector to get the size to fit the panels how we liked. Once that was done, Sarah traced the image onto the panels so that she could start cutting them out.
Move Over Picasso!
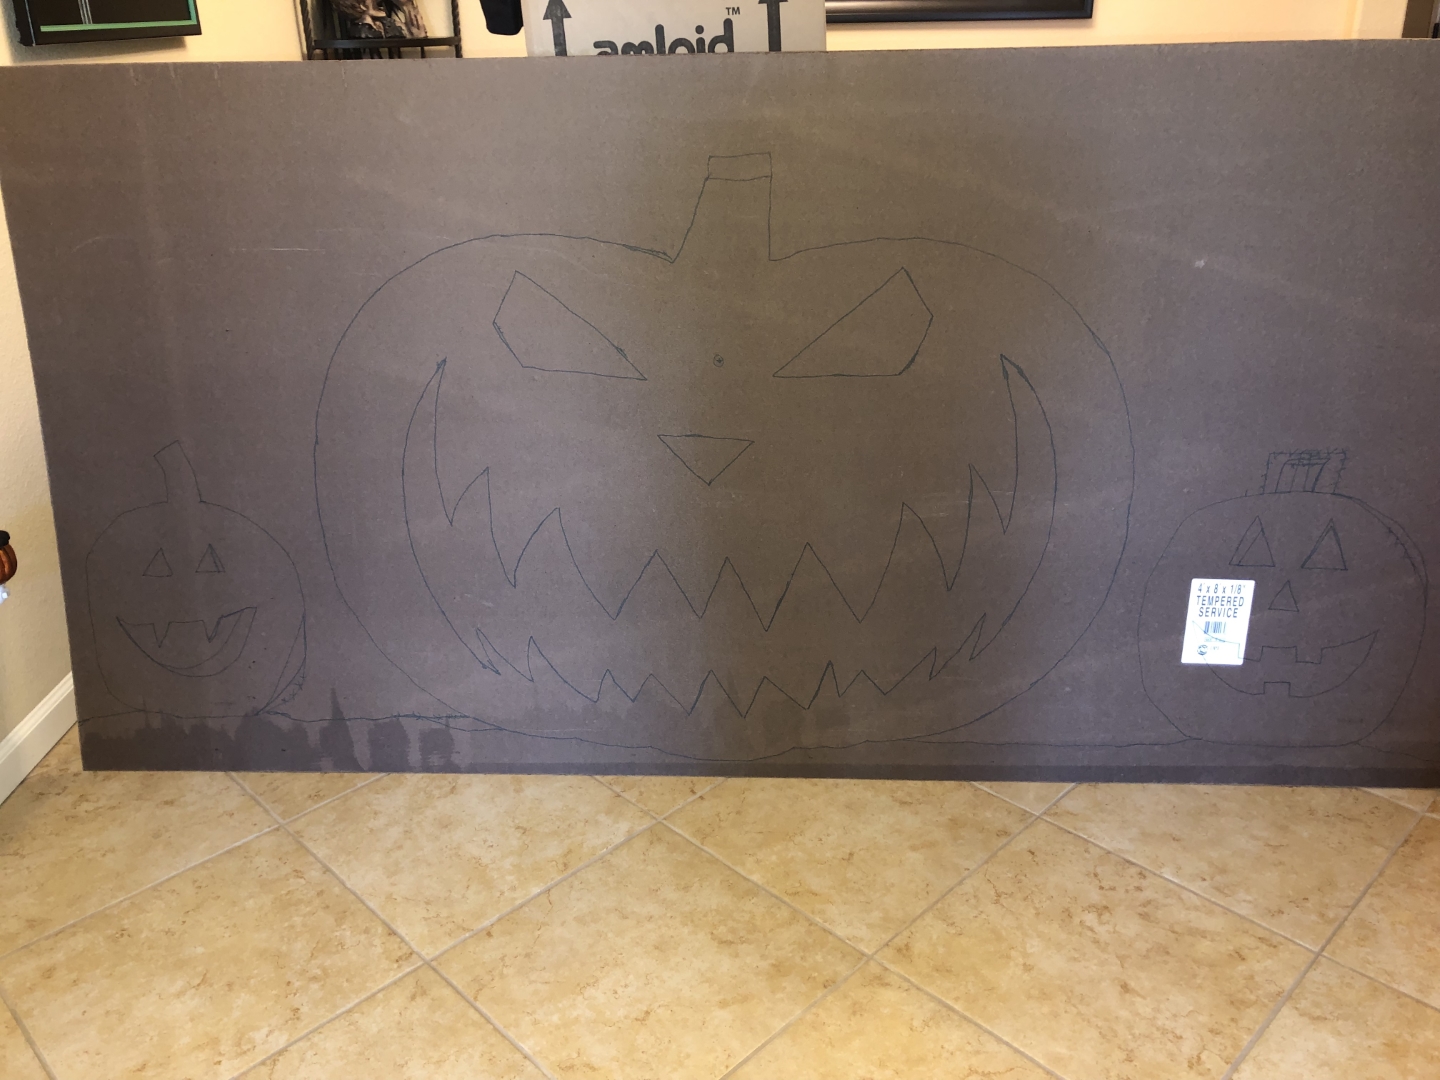
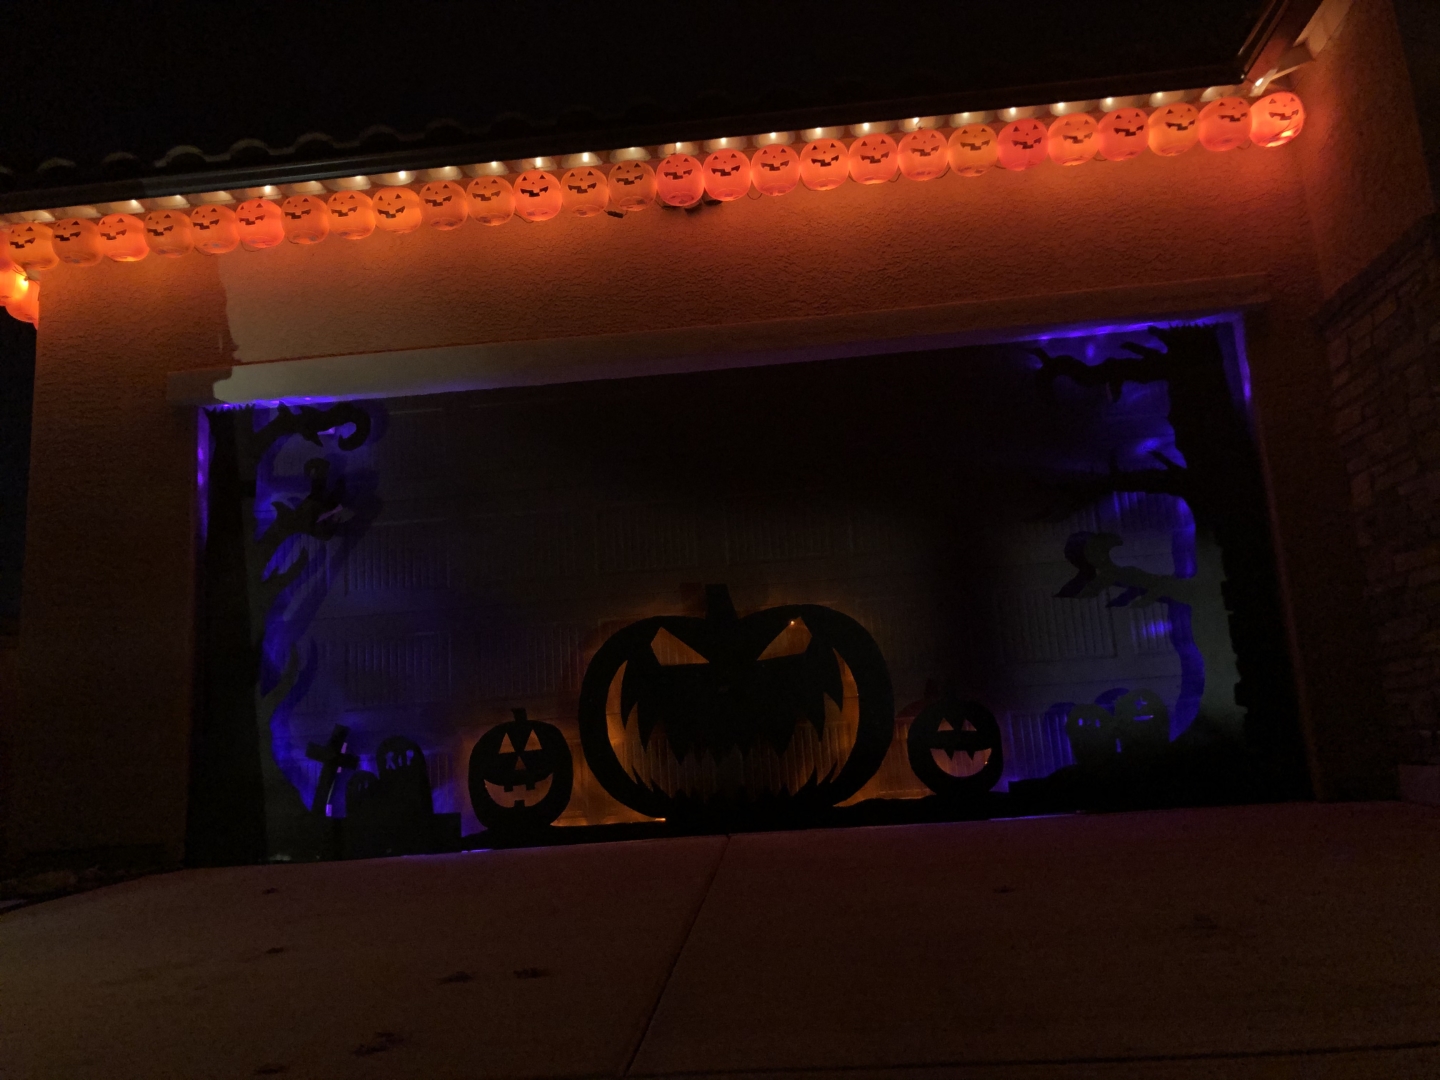
Here is the traced pumpkins that are on the center piece. We have three sections in total that span the width of our garage door since that’s where we decided that we wanted to set them up.
The New Face Of Jigsaw!
This is Sarah’s “I’m ready to use power tools!” face!
Leatherface Meet Your Match!
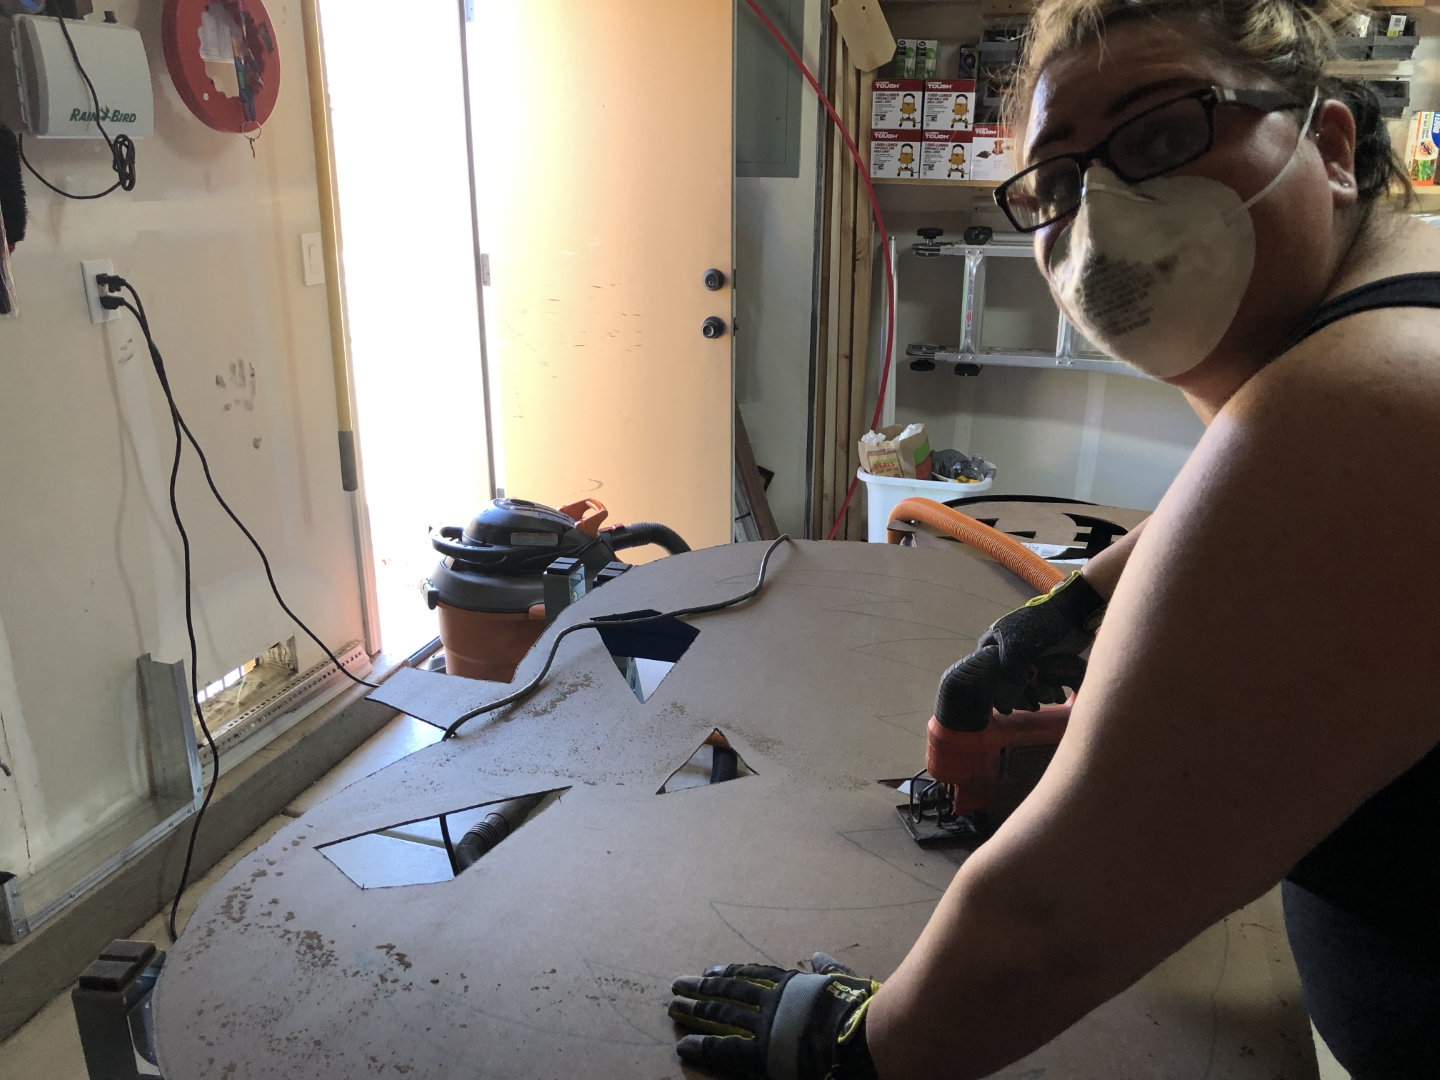
Well into the cutting, she’s pretty much mastered the art of using a jigsaw. This material is VERY dusty so a mask was a must. Even with our less-than-ideal way of attaching the shopvac to the saw, there was still so much of this dust everywhere.
Nearly Done With Cutting
Almost done with one of the two tree sections. Lots of nooks and crannies to get the blade into on this piece.
… And Done!
Here we have all the sections cut out (couldn’t get the pumpkins in the photo). Now to give them some backlighting and figure out how we are going to secure them in place to stand them up.
Ghetto-fabulous
The idea here is to make some spacers to offset the silhouettes a few inches from the garage door so that the backlighting can really radiate from behind the wood. I framed up a basic L-shaped stand and added some additional blocks onto the flimsier sections to make sure they didn’t bend or break once in place. Then I duct-taped the lights in place the way that we wanted them and then hot-glued the heck out of it so the lights would stay where we wanted them.
Magnets For The Win!
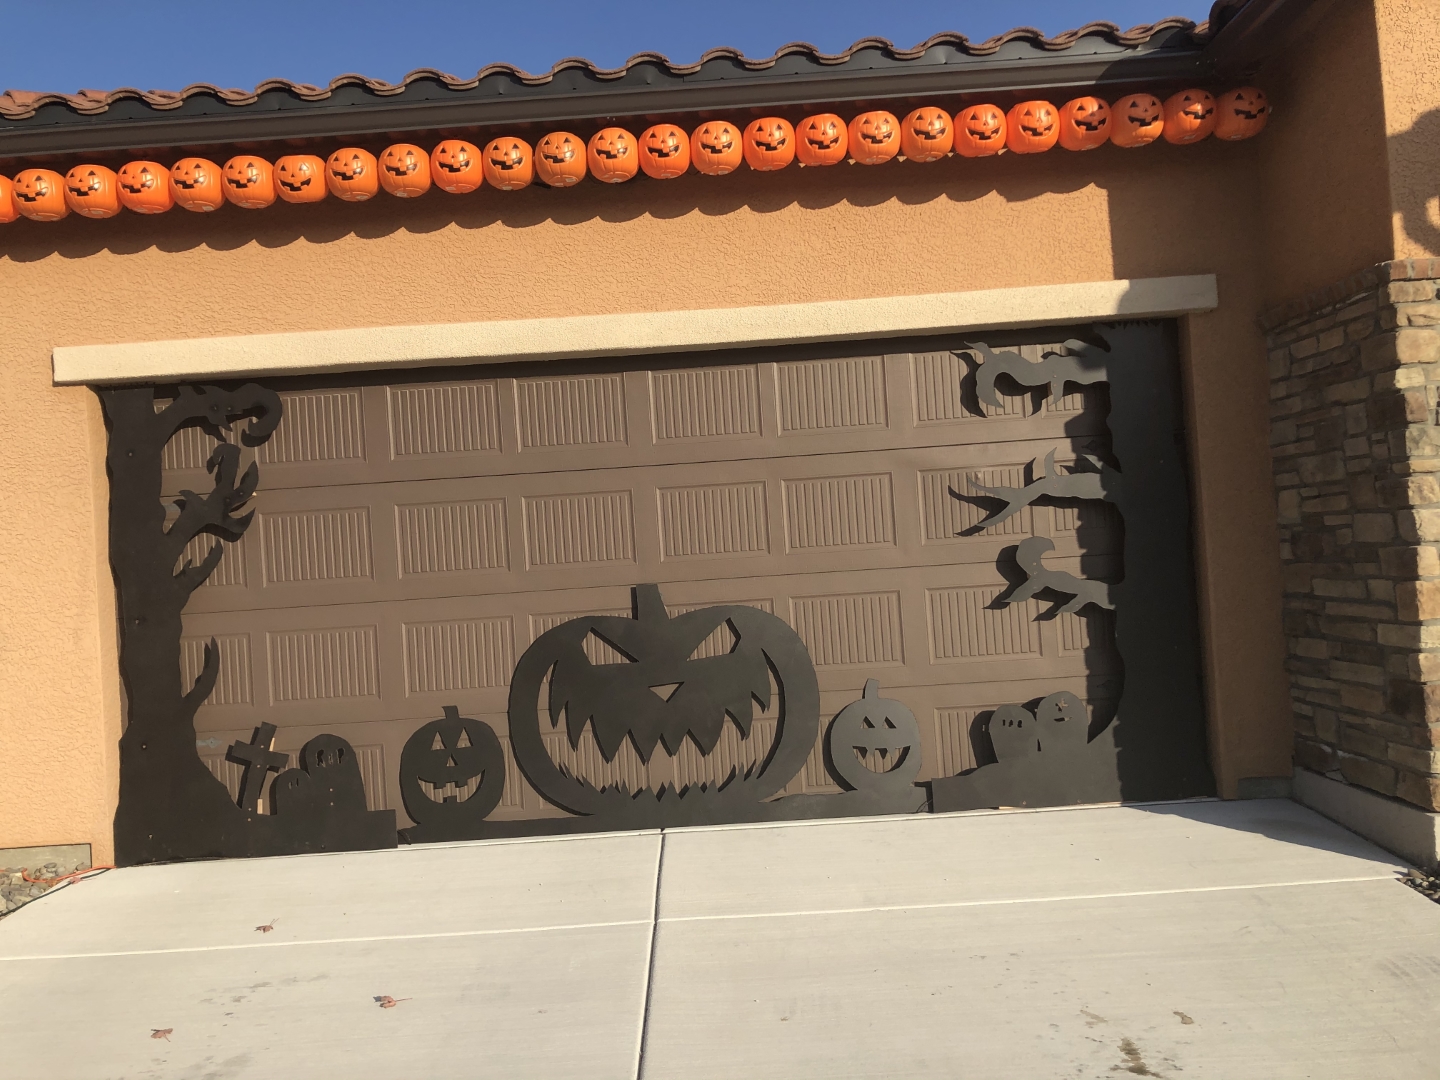
Here we have it all in place! What you don’t see is the magic that makes this sucker super easy to take down and setup. I attached 18″ magnetic tool holders to various sections of the wood on the back and this this sticks right up against the metal garage door. It’s not going anywhere! Those magnetic tool holders work wonders! You’ll find them used in other projects of ours, too.
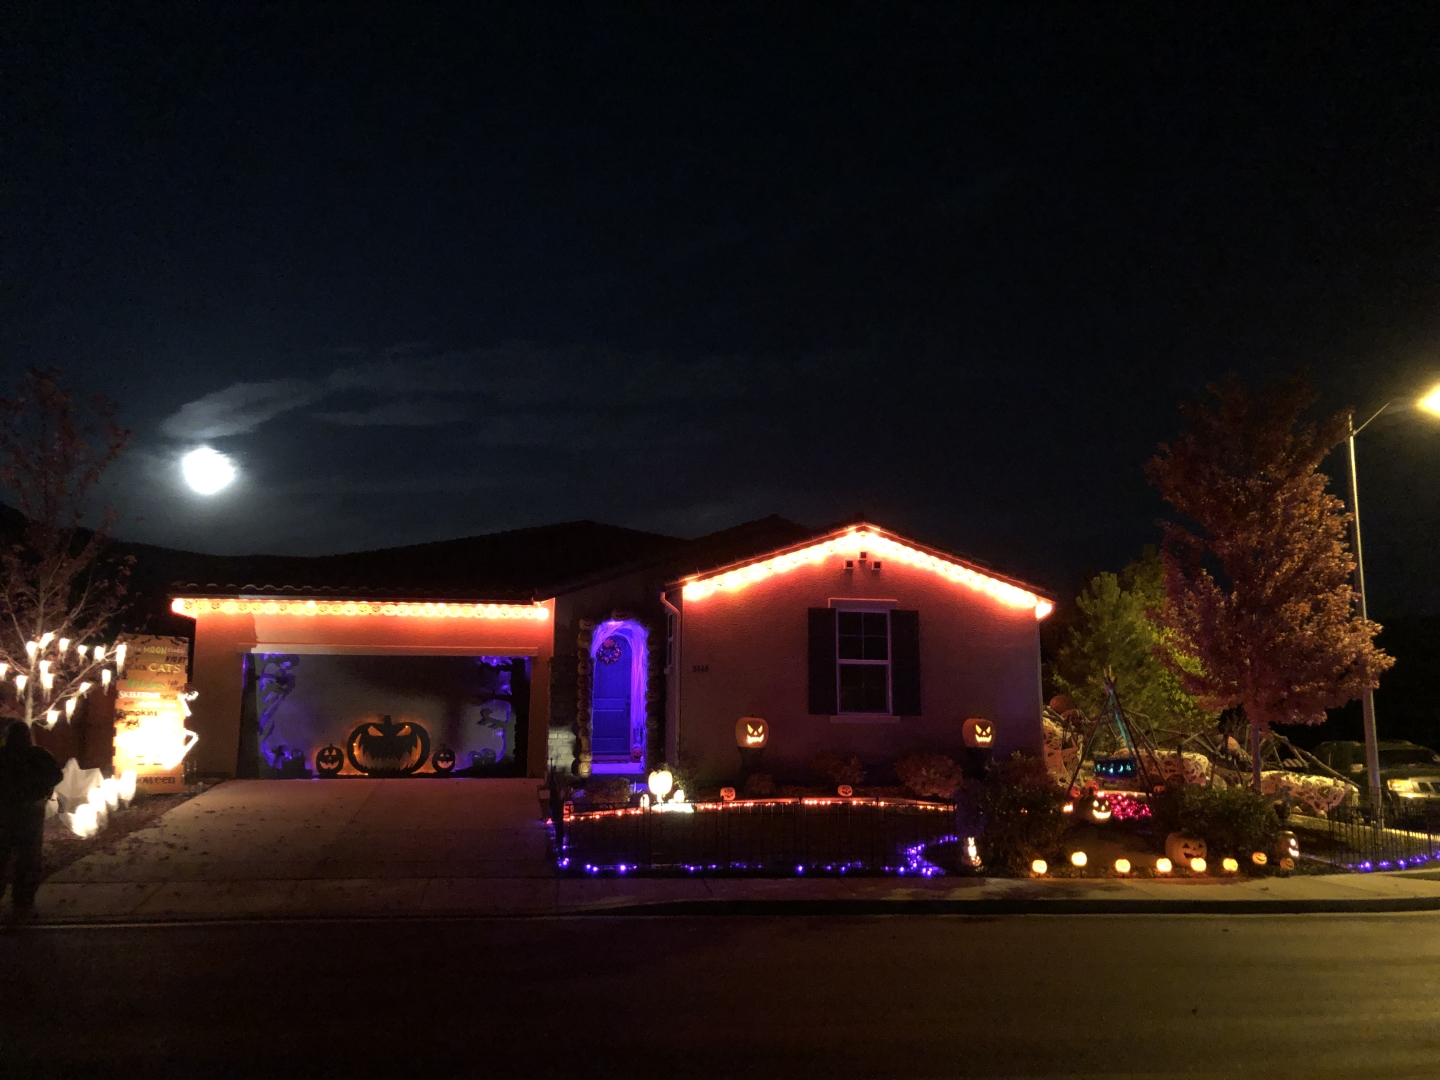
Stunning At Night!
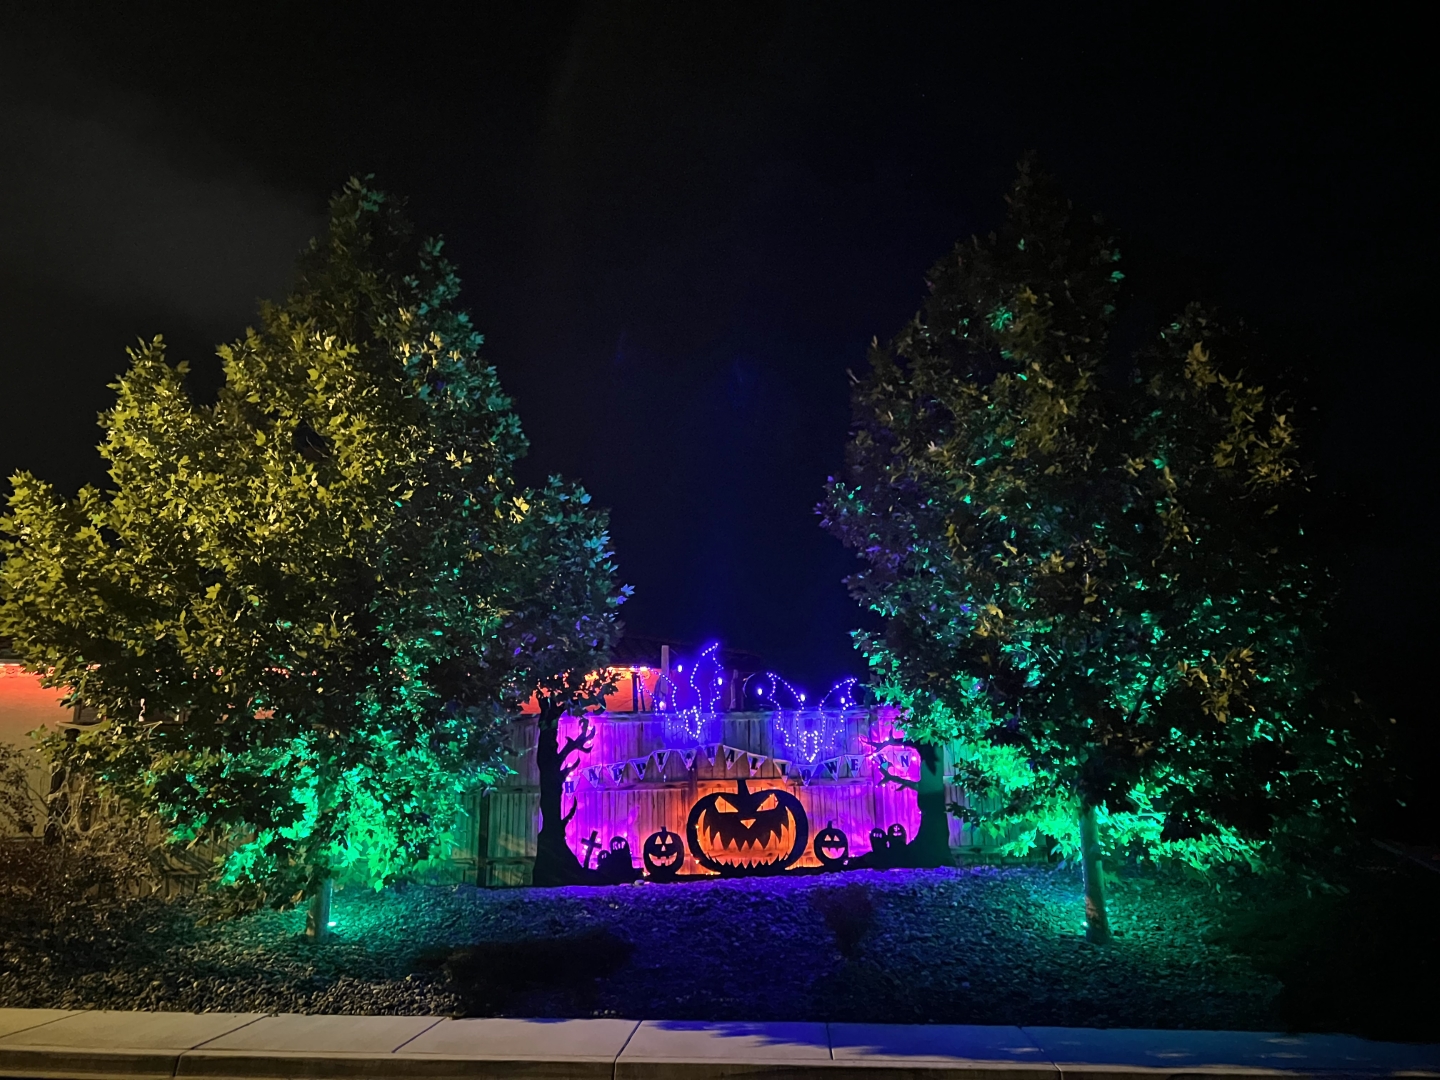
We had the silhouettes on our garage for two years before we decided that we wanted to move it in between some trees on our side yard to give it more of a “Wicked Woods” sort of vibe. We also had other plans for the garage so it needed to be moved. Here we’ve placed it between two large trees and secured it to the fence. No more magnets needed. We backlit the trees with green flood lights, and added a few extra pieces to give it more oomph.
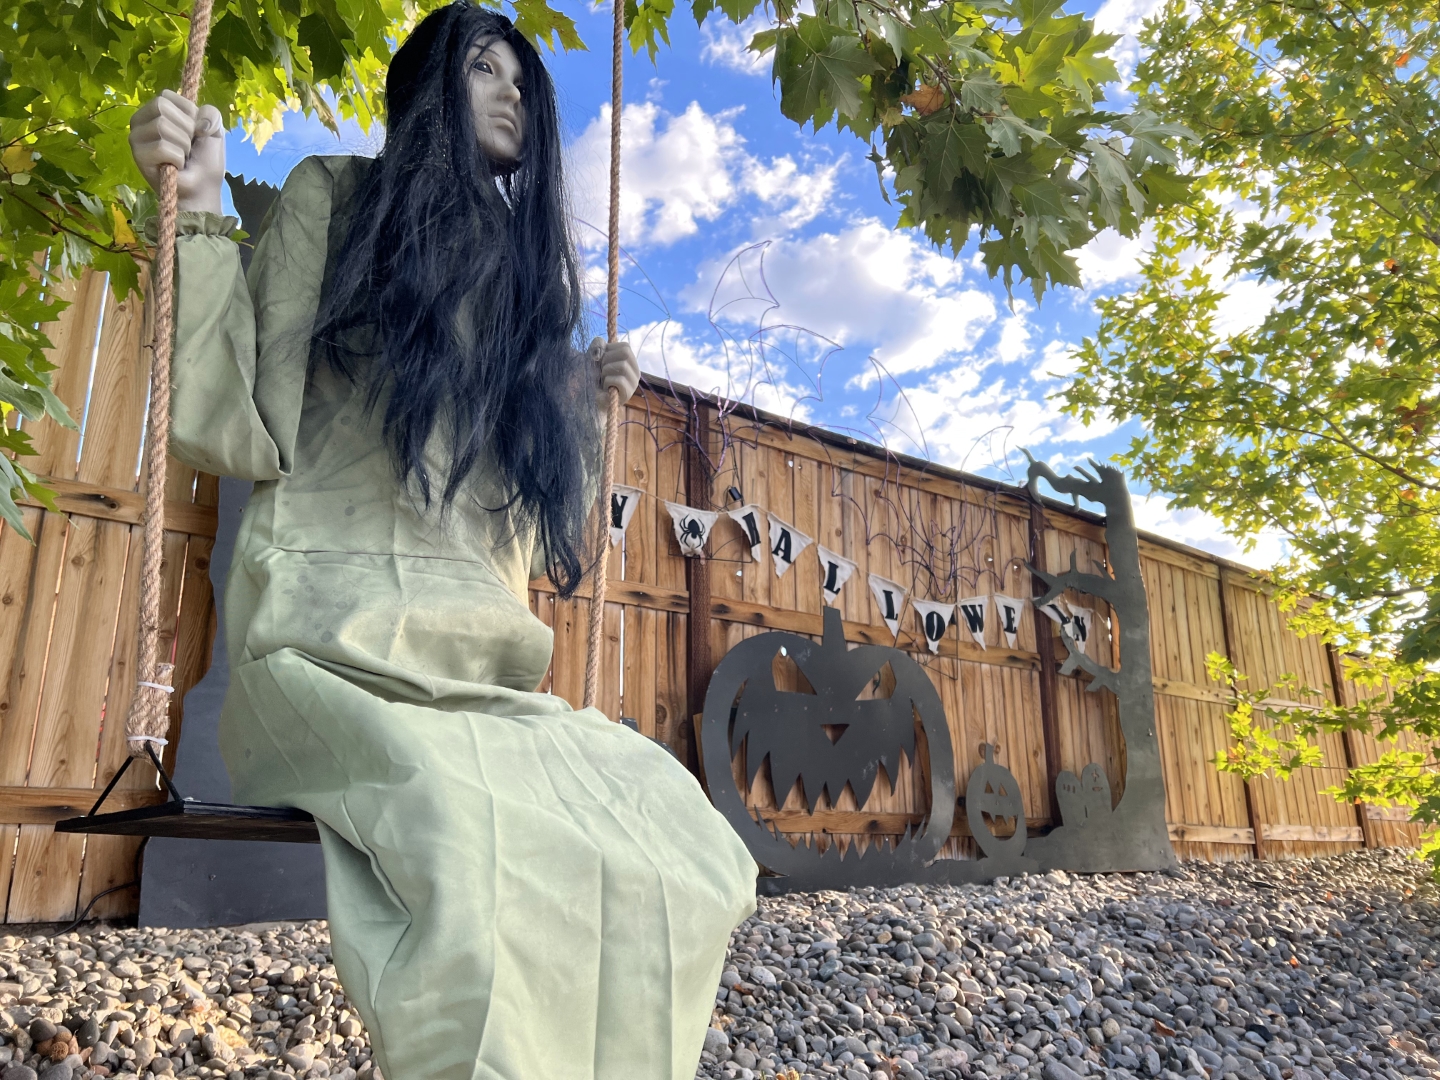
Hey, baby. Do you swing?
The second year of having the Wicked Woods, we added this creepy swinging girl. She adds to the nighttime effect nicely. We’ve also added to large “flying” bats that we mounted to the top of the fence above a Happy Halloween banner.
Beware The Wicked Woods
At night, the green uplights really add to the trees visually. The bats are very cool flapping away above the silhouette which we’ve also added more lights to so that it’s more vibrant.
Below are two video clips showing the bats in motion. The Wicked Woods has become one of our favorite things to look at during our nightly walk around the display. It’s so vibrant and gorgeous now. That swinging girl still creeps me out, though.